Working the second row and continuing a tutorial
Soooo... I did it again. I bought more yarn, and I'm waiting for it to be delivered. I'm currently debating whether or not I should continue with the Nine Square Blanket the way I planned when I ran out of yarn, or wait for the yarn and make it exactly like the pattern. But while I make up my mind, you can still enjoy the continuation of the last tutorial for working over the tail, plus I've included a tip for those turning chains, too.
Remember, this is not my pattern. It's provided for free by Yarnspirations for the World's Biggest Stocking. If you haven't done so already, you can download all the patterns for the project here. Let's crochet these blankets and help to set a world record! We left off in the last post at the end of the first row, where we worked into the slipknot as a chain. Now, we'll continue weaving in the tail. Ready?
Let's get started:
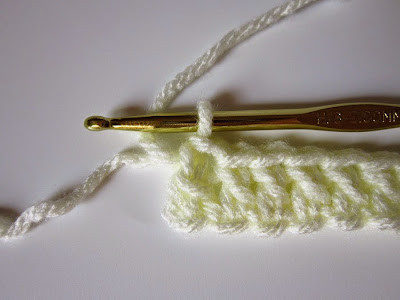 |
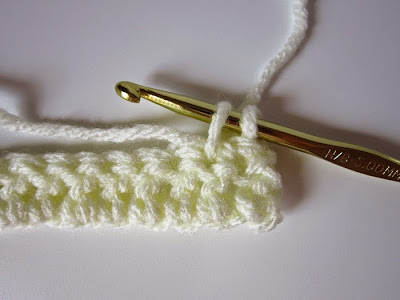
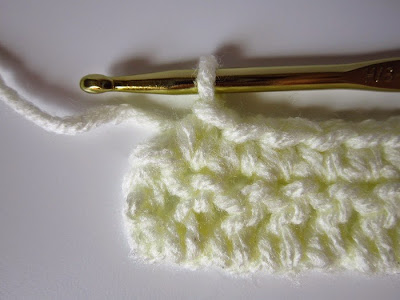
| The next row is going to be a simple row of single crochet stitches. To weave in the tail as you work, bring it up and over the working yarn before we make the turning chain. |
 |
| Chain 1. This will count as the first single crochet of the row. Hey, beginners: Are you having trouble working into your turning chains at the end of rows? Pull up some slack in the loop before you make the chain, then pull up to make slack again after you chain. Your loops should not be tight against the hook. |
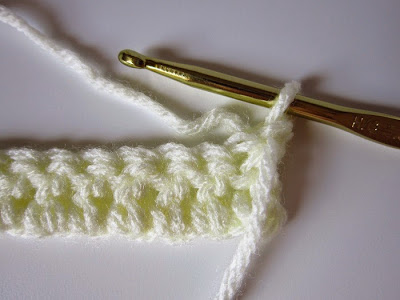 |
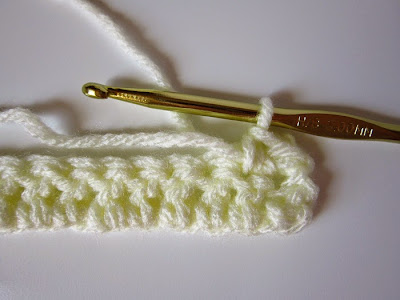
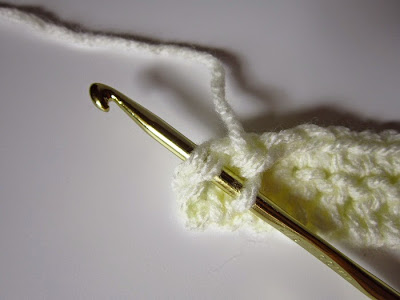
| When you turn your work, make sure the working yarn stays to the back of your hook. Bring the tail around the front of the stitch. |
 |
| And now, we're going to do something a little different. You're not going to make a stitch yet, we're just going to work on weaving in the tail. You can do this with the chain-1 on the hook, or get a separate hook if needed. Insert the hook in only the front loop of the next stitch. |
 |
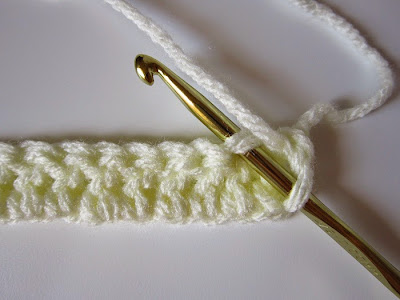
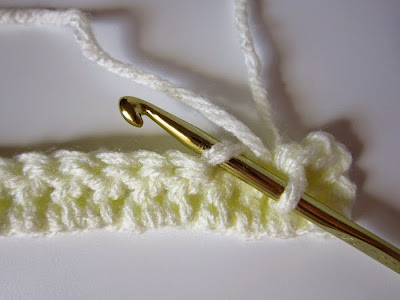
| Yarn over with the tail, and pull through the front loop of the stitch. For the next step, we'll go back to make that single crochet, but first, take a look at the next picture: |
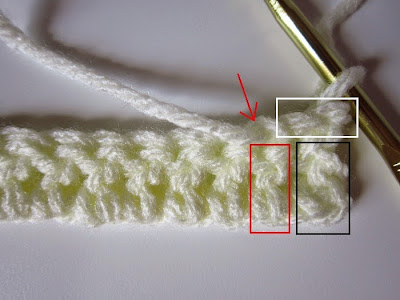 |
| This could trick you, so pay attention! In the white box, you see the base of the first stitch (the turning chain). You might also see what looks like the loops of another stitch. Look underneath! In the black box, you can see there is only one post under the turning chain. This extra "loop" is made by crossing over the front with the tail. Look in the red box, and you'll see the post for the next stitch. Above, the arrow points to the top loops of the second stitch (the loop we pulled the tail through). |
 |
| Insert your hook in the next stitch, making sure the tail is above the hook. Yarn over and pull up a loop for the single crochet. Now the tail is trapped in this stitch. |
 |
| Yarn over and pull through both loops to complete the single crochet. Now you have the turning chain and the first single crochet, which together count as two single crochet. |
 |
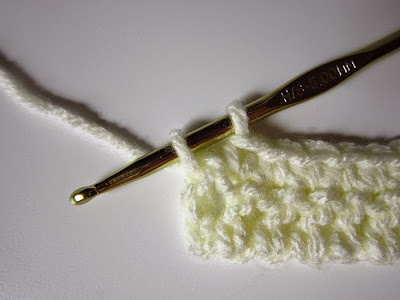
| Continuing with the tail, skip the next stitch and insert your hook in only the front loop of the following stitch. |
 |
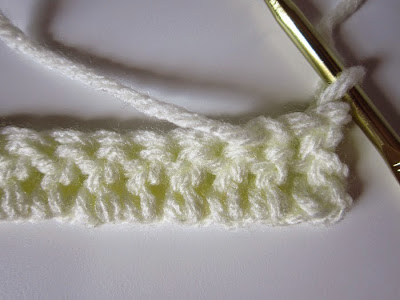
| Once you pull the tail through, you can see that the tail blends in with the skipped stitch. Just remember to insert the hook under the tail in the stitch when you work! |
 |
| Once you work a single crochet in each of these stitches, you can't see the tail under them! You could keep working across the row this way, but I like to zig-zag the tail through a few rows. We'll move it up in the next step: |
 |
| In a single crochet row, this is as simple as moving the tail over your working yarn before making the next stitch. Let the tail fall to the back and keep working across. |
 |
| Okay, newbies: So, if you've reached the end of your row, and you can't even find your turning chain, you made your stitches too tight. (That used to be me... I pulled my chains so tight that they would disappear into my work!) But if you can see that one little bar in the front, and can't get your hook in the stitch, follow along! |
 |
| There's two ways you can do this: Either turn your work the wrong direction (which can be confusing to you newbies), or, grab the end of your work and twist it slightly towards you. Hey, look! What's that thing? Oh...We found it! That's your turning chain! |
 |
| You may find it a bit difficult to learn how to work into this stitch as you twist it around, and that's why it could be easier to turn the work in the wrong direction as you insert the hook. I've developed a habit of just turning my work sideways at the end of the row. After many years of working this way, it's become second nature to flip it one way a bit, make the stitch, flop it back, chain the turning chain, then turn the right direction. |
 |
| Once you pull up the first loop of the stitch, you can turn your work back to the proper direction. No need to keep working backwards, or sideways, in my case! |
 |
| And now, we're ready for the next row! Next time, we'll pick up the tail and continue weaving it in, plus learn to find the more elusive single crochet turning chain. |
That was a lot of photos again!
That's it for this time...
Happy Crocheting!


Comments
Post a Comment
Spam sucks! Your comment will not be visible until approval. Please do not include links in your comment without permission. Thanks!