The squares continue...
It's getting really, really close to the deadline to mail in the World's Biggest Stocking squares in time for the contest! Not only do I need to work quickly to finish this blanket to add to my donations, I also have to spend time trying to fix my printer, or just go buy a new one. For each blanket to count as an entry to win the $5,000 prize, I have to print and fill out the form provided by Yarnspirations... But, my printer is inhabited by the spirit of an alien spaceship right now, and it's doing whatever it wants instead of printing my form for me. I'm half expecting it to start hovering and fly away.
Anyway, I started making these blankets to donate before the $5,000 contest was announced, and I'll still continue to make them after the contest is over. But, I mean, c'mon... I want to win that money, don't you? I'm trying to get as many done before the June 22nd deadline, but I think this will be the last one I'll be able to finish before I need to mail them in for my entries.
Okay, let's get back on track... Remember that the pattern for the Granny Square Blanket isn't my design: It's provided for free by Yarnspirations for the World's Biggest Stocking project! You can download the patterns here. Just like me, you only have a short time left to donate your stocking squares to enter in the contest for $5,000. But, more squares will still be needed. Please help make the blankets that will be used to create a world-record setting stocking! The stocking will later be disassembled, and the blankets will be donated to charities.
Let's get started!
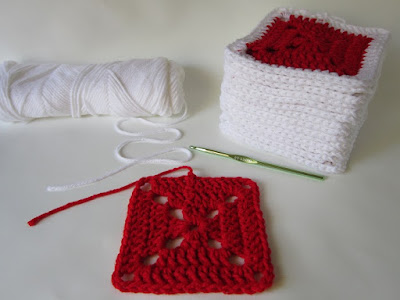 |
| We left off last time where I had finished the centers of all the red squares. I've worked ahead to finish the next round of white on all these squares, so let's take a look at the last square left to work on, and how I'm joining the contrasting color. |
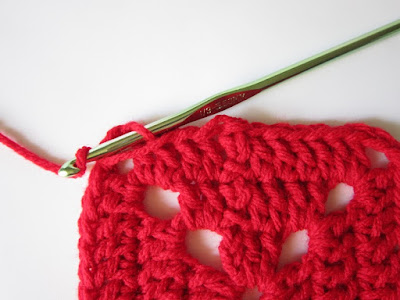 |
| I've decided to stray from the pattern. I hate how no matter which way you pull the new color through, there's a little tiny jog in the beginning of the round. I'm weaving in my ending tails, and I'll work over them with the contrasting color. Here, I'm pulling the tail through the front loop of every other stitch. |
 |
| And here, I found a quicker way. I turned the square over and started working in the opposite direction. I'm still working into the same loops of the stitches, but now the front loops are at the back of the stitches. Working this way lets me pull the tail through more easily, instead of having to insert the hook over the working yarn. You could pull the tail through the back loops of the stitches, but I tend to catch the strand with the hook and pull the tail out when I work the next round. Do whatever works for you! |
 |
| Even though it's only worked through one round of stitches, this is an unbelievably secure way to weave in the tail. Once the next round is worked over these stitches, the tail will be trapped forever! I don't worry about trimming the end now, because it usually gets pulled back into the stitches. I can trim it later, if needed. |
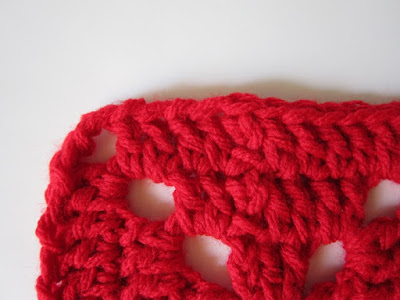 |
| This definitely makes the stitches look funny... for now. Once I work into them, you won't be able to see the difference! Beginners: You might need to mark your ending stitch if you want to keep following the pattern as written. I have no problem finding my ending stitch and turning chain, but for those who are new, you might lose it when you work around. |
 |
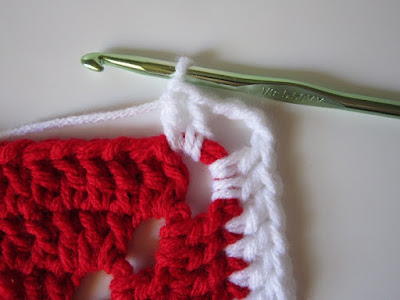
| I'm beginning the new color without a slip knot, just like I showed you when I changed colors on the Big Granny Square Blanket. I yarn over with the tail for the first step of the stitch, and this secures it without a knot. |
 |
| If you bind off for the color like I'm doing, and you do lose your beginning stitch, don't worry! All you have to do is make a double crochet in each double crochet around - the pattern is simple, so where you begin isn't too important. Making sure you have the correct number of stitches in the round is what really matters. |
 |
| Every corner is worked the same way, making each side of all the rounds increase by four double crochet. As long as you have 15 double crochet in between the corner chain-3 spaces, it won't matter where you begin. |
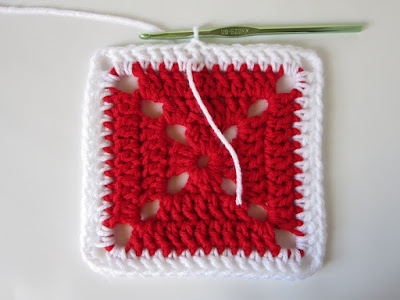 |
| Because I weaved the tail of the last round in following the stitch direction, I'll leave the beginning tail of this round loose. Later, I'll weave it in the opposite direction to balance the slight change in thickness. |
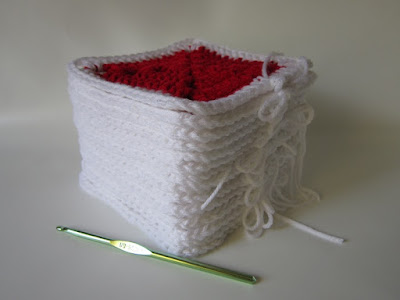 |
| Now, these squares are ready for the last round of single crochet in the beginning color. I'm going to bind off and work over the tail for this round, too. It's the end of the day, and I have a lot of work with a needle to weave in those beginning tails. But do you notice that there's one square missing? (Probably not. I'm sure not many of you are actually counting the stack of squares to make sure all 16 are there!) |
 |
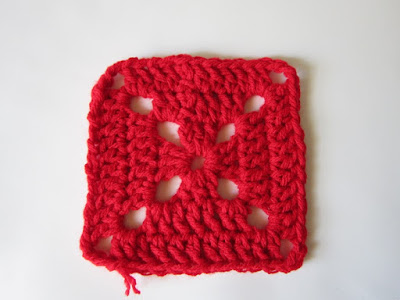
| I went ahead and completed one square. I had to. The tiny bit of red left over from making the centers of these squares is just floating around, waiting to get tangled. After finishing this round, I still had a bit left! |
I've come to a conclusion: Forget taking it easy; I want my chance at winning that money! I can take a break when it's over. We'll continue with finishing these and starting the rest of the squares soon.


Comments
Post a Comment
Spam sucks! Your comment will not be visible until approval. Please do not include links in your comment without permission. Thanks!